What is the Creality Ender 3 V3 SE?
Creality ender 3 v3 se review. If you’ve been keeping an eye on the 3D printing world, you’ve probably heard the name “Ender 3” more times than you can count. Creality’s Ender 3 series has become almost synonymous with budget 3D printing, and for good reason. These machines have democratized the hobby, making it accessible to students, hobbyists, and small businesses alike. In 2025, the conversation continues with the Creality Ender 3 V3 SE, a refined iteration that brings modern conveniences to the beloved platform.
The Ender 3 V3 SE represents Creality’s commitment to keeping pace with evolving user needs while maintaining affordability. As a budget 3D printer in 2025, it faces stiff competition from newer entrants, but it holds its ground thanks to a massive community, proven reliability, and incremental improvements that matter. Whether you’re printing miniatures for tabletop gaming, functional parts for DIY projects, or prototypes for your startup, the V3 SE aims to deliver consistent results without breaking the bank.
What makes this particular model stand out? It’s the combination of thoughtful upgrades—like automatic bed leveling and a direct drive extruder—with the familiar, user-friendly design that made the original Ender 3 a legend. In this comprehensive review, we’ll explore everything from specifications to real-world performance, compare it with its bigger sibling (the Ender 3 V3 Plus), and help you decide if this is the right printer for your needs.
Key Specifications of the Ender 3 V3 SE (Creality Ender 3 V3 Specs)
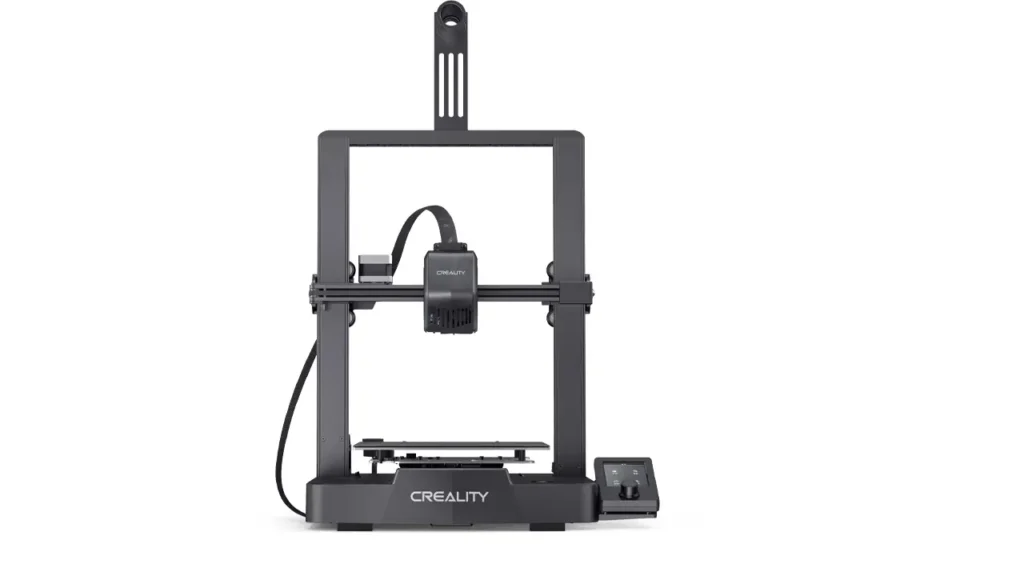
Let’s start with the numbers, because specifications tell us a lot about what a printer can—and can’t—do. The Creality Ender 3 V3 SE specs reveal a machine designed for speed, precision, and ease of use:
| Specification | Details |
|---|---|
| Build Volume | 220 × 220 × 250 mm |
| Max Printing Speed | 250 mm/s |
| Acceleration | 2500 mm/s² |
| Extruder Type | Sprite Direct Drive |
| Bed Leveling | CR Touch Auto Leveling (25-point) |
| Hotend Temperature | Up to 260°C |
| Heated Bed Temperature | Up to 100°C |
| Nozzle Diameter | 0.4 mm (standard) |
| Filament Compatibility | PLA, PETG, TPU, ABS |
| Frame Type | Aluminum extrusion (Cartesian) |
| Display | 4.3-inch color touchscreen |
| Connectivity | USB, SD Card, Wi-Fi (via Creality Cloud) |
These specifications position the Ender 3 V3 SE as a capable workhorse. The build volume of 220 × 220 × 250 mm is perfectly adequate for most home projects—think phone stands, cosplay parts, replacement brackets, and decorative items. It’s not massive, but it’s proven to be the sweet spot for desktop 3D printing.
The headline feature here is the 250 mm/s maximum printing speed. Now, let’s be realistic: you won’t always print at maximum speed, especially for detailed work. But having that capability means your draft prints and larger, less intricate models can finish significantly faster than on older machines. Paired with 2500 mm/s² acceleration, the V3 SE can zip through straight lines and handle direction changes without sacrificing too much quality.
The automatic bed leveling via CR Touch is a game-changer for beginners. Gone are the days of manually adjusting bed springs with a piece of paper. The 25-point mesh compensation ensures your first layer adheres properly across the entire build surface, which is often the difference between a successful print and a spaghetti disaster.
Sprite Direct Extruder and Its Advantages
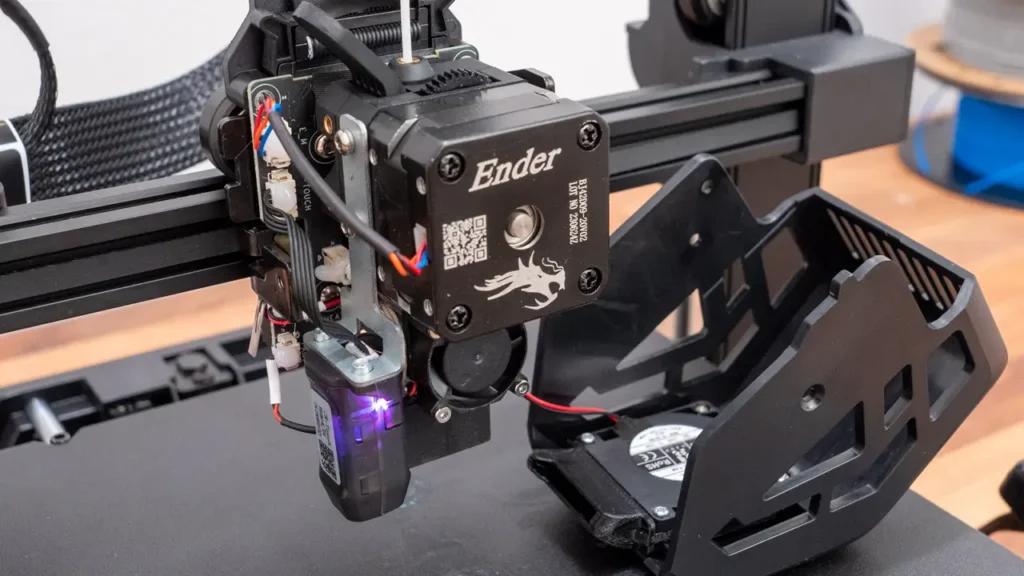
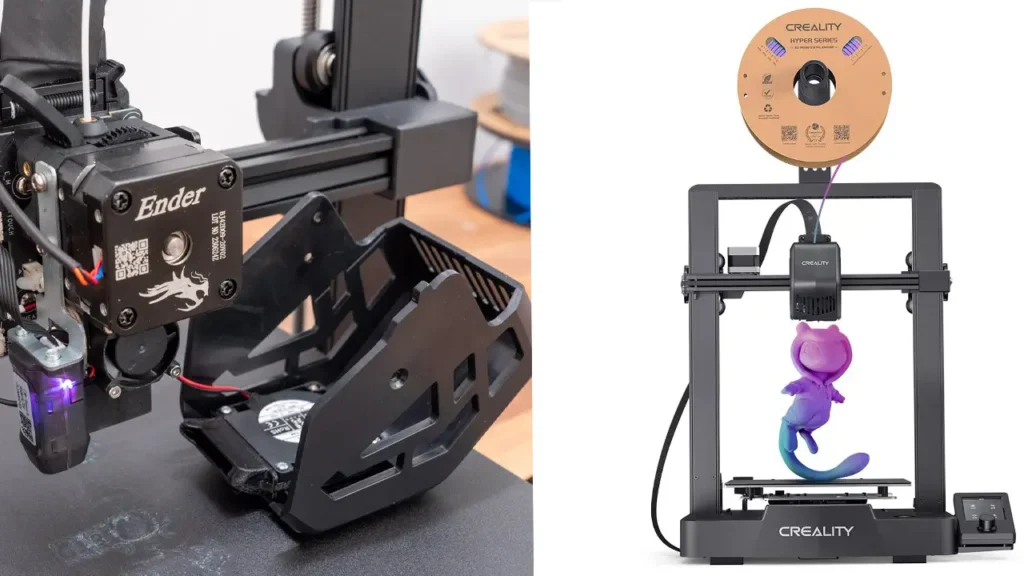
One of the most significant upgrades in the Ender 3 V3 SE is the Sprite direct extruder. If you’re new to 3D printing, let me explain why this matters.
Traditional Ender 3 models used a Bowden-style extruder, where the motor that pushes filament sits on the printer’s frame, and the filament travels through a PTFE tube to reach the hotend. This setup is lighter on the print head (allowing faster movements), but it introduces a problem: the distance between the motor and the hotend creates lag and flexibility. When you try to print with soft materials like TPU or need precise retractions to minimize stringing, Bowden systems struggle.
The Sprite direct extruder solves this by mounting the motor directly on the print head. The filament path is now just a few centimeters, giving you near-instantaneous control. This means:
- Better print quality with flexible filaments – TPU, which is rubbery and compresses easily, no longer buckles in a long tube. You can print phone cases, gaskets, and wearable items with confidence.
- Improved retraction performance – Retractions (pulling filament back slightly to prevent oozing) are faster and more effective. You’ll see cleaner prints with fewer strings and blobs.
- Enhanced detail on small features – Because the extruder responds immediately to commands, intricate details like fine text or tiny mechanical parts come out crisper.
The trade-off? A slightly heavier print head, which theoretically could introduce minor ringing (ripples on surfaces) at very high speeds. In practice, Creality has tuned the V3 SE’s motion system well enough that most users won’t notice any downsides. The benefits far outweigh any potential drawbacks, especially for beginners who want to experiment with different materials.
The Sprite extruder also features a dual-gear design, which grips the filament more securely than single-gear systems. This reduces the chance of slipping during demanding prints, ensuring consistent extrusion from start to finish.
Beginner’s Delight: Why the Ender 3 SE is One of the Best Beginner 3D Printers
Choosing your first 3D printer can feel overwhelming. There are dozens of models, each claiming to be the ultimate solution. So what makes the Ender 3 V3 SE stand out as one of the best beginner 3D printers available today?
1. Ease of Assembly
The Ender 3 V3 SE arrives partially assembled. You’re not dealing with hundreds of individual screws and parts; instead, you’ll attach the gantry to the base, connect a few cables, and you’re essentially ready to go. Most users report assembly times of 30 minutes to an hour, even if it’s their first time. Clear instructions and well-labeled components take the guesswork out of the process.
2. Automatic Bed Leveling
I cannot stress enough how important this is for newcomers. Manual bed leveling—adjusting four corners while sliding paper underneath the nozzle—is tedious and error-prone. The CR Touch automatic bed leveling system probes the bed at 25 points, creating a compensation mesh that accounts for any slight warping or unevenness. You press a button, walk away for a few minutes, and return to a perfectly calibrated printer.
3. User-Friendly Interface
The 4.3-inch color touchscreen is intuitive. Icons are large, menus are logically organized, and you don’t need to be a tech wizard to navigate settings. Want to preheat the bed and nozzle? One tap. Need to adjust Z-offset? A few quick presses. The interface even includes helpful wizards for tasks like filament loading and leveling.
4. Massive Community Support
This is perhaps the Ender 3 series’ greatest strength. With millions of units sold worldwide, there’s an enormous ecosystem of tutorials, troubleshooting guides, and community forums. Encountered an issue? Someone else has already solved it and posted the fix on Reddit, YouTube, or the Creality forums. The Ender 3 community mods culture means you’ll find endless upgrade paths and customization options as your skills grow.
5. Affordable Price Point
Budget matters, especially when you’re testing the waters. The Ender 3 V3 SE typically retails for under $300 USD, making it accessible to students and hobbyists. You’re getting modern features like direct drive and auto-leveling at a price that was unthinkable just a few years ago.
6. Forgiving Learning Curve
Yes, 3D printing involves learning new concepts—slicing, supports, layer adhesion, etc.—but the V3 SE’s reliable hardware means you’re fighting fewer equipment problems while you learn. The printer just works most of the time, letting you focus on improving your design and slicing skills rather than constantly tinkering with mechanics.
If you’re stepping into 3D printing for the first time in 2025, the Ender 3 V3 SE offers a welcoming, frustration-minimizing experience. It’s powerful enough to grow with you but simple enough that you won’t feel lost on day one.
Ender 3 V3 SE vs. Ender 3 V3 Plus: A Detailed Comparison
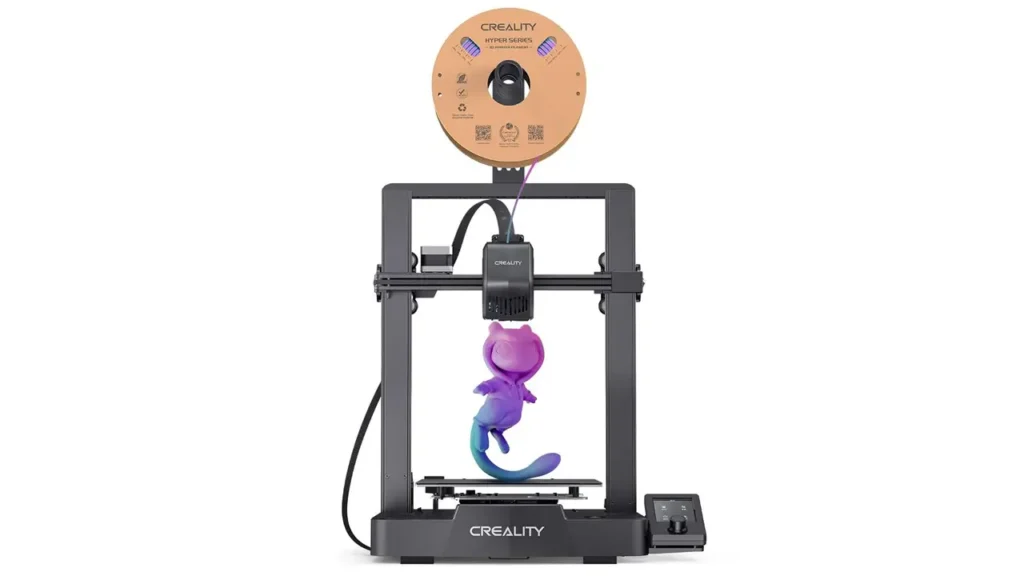
Creality offers multiple variants in the V3 lineup, and the most common question prospective buyers ask is: “Should I get the SE or the Plus?” The Ender 3 V3 Plus comparison reveals distinct trade-offs in size, speed, and cost.
| Feature | Ender 3 V3 SE | Ender 3 V3 Plus |
|---|---|---|
| Build Volume | 220 × 220 × 250 mm | 300 × 300 × 330 mm |
| Motion System | Cartesian (traditional) | CoreXZ |
| Max Speed | 250 mm/s | 600 mm/s |
| Acceleration | 2500 mm/s² | 20,000 mm/s² |
| Auto Bed Leveling | CR Touch (25-point) | CR Touch (49-point) |
| Extruder | Sprite Direct Drive | Sprite Direct Drive Pro |
| Input Shaping | No | Yes (dual-axis) |
| Nozzle Heating | ~90 seconds to 200°C | ~40 seconds to 200°C |
| Frame | Standard aluminum | Reinforced with dual Z-axis |
| Typical Price | ~$250-300 USD | ~$400-500 USD |
Motion System: Cartesian vs. CoreXZ
The biggest architectural difference is the CoreXZ motion system in the Plus. Traditional Cartesian printers (like the SE) move the bed in one axis (Y), the print head left-right (X), and up-down (Z) via separate motors. CoreXZ systems use two motors working in tandem to control both X and Z movements, which reduces the moving mass on the print head and allows for much higher accelerations.
The practical result? The Ender 3 V3 Plus can print at speeds up to 600 mm/s with 20,000 mm/s² acceleration. That’s blazing fast. You can complete prints in a fraction of the time, which matters if you’re running a small business or iterating through prototypes rapidly.
However, CoreXZ introduces complexity. Belt tensioning becomes more critical, and troubleshooting can be trickier. For beginners, the SE’s simpler Cartesian design is often easier to understand and maintain.
Build Volume: When Size Matters
The Plus boasts a 300 × 300 × 330 mm build area, giving you 2.4 times the volume of the SE. If you’re printing helmets, large vases, architectural models, or any project that exceeds 220 mm in any dimension, the Plus is the obvious choice. The extra real estate also means you can fit more small parts in a single print job, improving efficiency.
For most hobbyists, though, the SE’s 220 × 220 × 250 mm is entirely sufficient. It’s rare that home users need to print objects larger than this in one go.
Auto-Leveling Precision
Both models feature CR Touch, but the Plus uses a 49-point mesh versus the SE’s 25-point. More probe points mean finer compensation for bed irregularities, which can improve first-layer adhesion on larger prints. In practice, both systems work excellently; the difference is marginal unless you’re pushing the limits of the build plate.
Input Shaping: The Secret to High-Speed Quality
The V3 Plus includes input shaping, a technique that compensates for printer vibrations (ringing) at high speeds. When the print head accelerates or changes direction suddenly, the frame and belts can resonate, creating ripples on your print’s surface. Input shaping uses accelerometers to measure these vibrations and adjusts motor movements to counteract them.
The SE lacks this feature, meaning you’ll see more ringing if you push speeds to the max. For typical printing (100-150 mm/s), it’s not a concern. But if speed is your priority, the Plus delivers cleaner results at extreme velocities.
Price and Value Proposition
The SE is the budget king, offering tremendous value for around $250-300. The Plus costs $400-500, nearly double. That extra money buys you speed, size, and advanced features. Which is right for you depends on your needs:
- Choose the SE if: You’re a beginner, budget-conscious, printing typical-sized objects, and value simplicity and community support.
- Choose the Plus if: You need a large build volume 3D printer, plan to run commercial projects, want the fastest print times possible, or enjoy tinkering with advanced settings.
Both are excellent machines. The SE is the approachable workhorse; the Plus is the performance beast.
When to Choose the Ender 3 V3 Plus: Large Build Volume Benefits
Let’s dive deeper into scenarios where the large build volume 3D printer capabilities of the Ender 3 V3 Plus truly shine.
1. Cosplay and Costume Props
Full-scale helmets, armor pieces, and props often exceed 220 mm in one or more dimensions. The Plus’s 300 × 300 × 330 mm space lets you print these items with fewer seams and assembly steps. A Mandalorian helmet, for instance, might require splitting into 6+ parts on the SE but could print in 2-3 larger sections on the Plus, saving assembly time and improving structural integrity.
2. Functional Prototyping
Engineers and product designers frequently need to test full-size mockups. A prototype handle, enclosure, or mechanical component often benefits from being printed at actual scale rather than scaled down. The Plus accommodates these needs without forcing you to break models into tiny, difficult-to-assemble pieces.
3. Tabletop Gaming and Terrain
Printing terrain for wargaming (think Warhammer 40K or D&D campaigns) is hugely popular. Large scenery pieces—castles, mountains, buildings—look far better when printed as single units. The Plus’s volume allows for impressive, detailed setlines that would otherwise require extensive assembly.
4. Production Runs
If you’re selling products on Etsy or fulfilling small batch orders, fitting 20-30 items on the bed instead of 10-15 means doubling your output per print cycle. The Plus’s extra area translates directly to increased productivity, which can justify the higher upfront cost through time savings.
5. Artistic and Decorative Projects
Sculptors, artists, and interior designers creating vases, lamps, or decorative panels appreciate the freedom to go big. A 280 mm tall vase just isn’t possible on the SE without splitting it, which creates visible seam lines. The Plus preserves artistic vision by enabling single-piece prints.
That said, size comes with responsibilities. Larger prints consume more filament, take longer (even at high speeds), and demand more precise bed leveling. A 30-hour print on the Plus failing at hour 28 is heartbreaking. Always consider whether you truly need the extra volume or if clever design and assembly can achieve your goals on the SE.
Practical Tips for Printing on the Ender 3 V3 SE and V3 Plus
Owning a printer is one thing; getting great prints consistently is another. Here are actionable tips to maximize your success with both models:
Initial Setup and Calibration
After assembly, run the auto bed leveling routine before your first print. Then, print a first layer calibration test (available free on platforms like Thingiverse). This ensures your Z-offset is dialed in perfectly. Even with auto-leveling, fine-tuning the nozzle’s starting height by 0.05-0.1 mm can make the difference between prints that stick beautifully and ones that peel up mid-job.
Material Selection for Beginners
Start with PLA. It’s forgiving, doesn’t require a heated enclosure, and prints reliably at 200-210°C nozzle / 50-60°C bed. Once comfortable, experiment with PETG for more durable parts (230-250°C / 70-80°C) or TPU for flexible items (220-230°C / 40-50°C). The Sprite direct extruder handles all these materials well.
Avoid ABS initially unless you have good ventilation and can manage warping. ABS requires higher temperatures (230-260°C / 90-100°C) and an enclosure to minimize drafts.
Slicing Settings That Matter
Your slicer (Cura, PrusaSlicer, or Creality’s own software) controls how models are translated into printer instructions. Key settings:
- Layer Height: 0.2 mm is a great balance of speed and quality. Go to 0.12 mm for miniatures, 0.28 mm for draft prints.
- Print Speed: Start at 50-60 mm/s for quality, 100-120 mm/s for functional parts. The SE can handle 150+ mm/s on simple geometries; the Plus excels at 200-400 mm/s with proper tuning.
- Infill: 15-20% is sufficient for most items. Functional parts under stress might need 40-50%.
- Supports: Enable supports for overhangs beyond 45-50 degrees. Use tree supports for easier removal.
Bed Adhesion Tricks
Even with auto-leveling, some materials benefit from adhesion aids. PLA usually sticks fine to the textured PEI sheet, but if you’re struggling, try a thin layer of glue stick or hairspray on the bed. For PETG, avoid glue (it sticks TOO well and can damage the bed); instead, slightly reduce bed temperature to 65-70°C for easier removal.
Maintenance Routines
Every 10-20 print hours, check belt tension. Belts should be tight enough that they “twang” slightly when plucked but not guitar-string tight. Loose belts cause artifacts; over-tight belts wear bearings prematurely.
Clean the nozzle regularly. If you notice under-extrusion or inconsistent layers, perform a “cold pull” with nylon filament to clear clogs. For the direct drive Sprite, also ensure the extruder gears are free of filament dust.
Lubricate Z-axis lead screws every few months with a light machine oil or PTFE-based lubricant. This keeps vertical movements smooth and quiet.
Troubleshooting Common Issues
- Stringing: Increase retraction distance (4-6 mm on direct drive) and speed (40-60 mm/s). Lower nozzle temperature by 5-10°C.
- Layer Shifts: Tighten belts, reduce print speed, ensure stepper motor drivers aren’t overheating.
- Warping: Use a brim or raft, ensure bed temperature is adequate, eliminate drafts.
- First Layer Not Sticking: Recalibrate Z-offset, clean bed with isopropyl alcohol, increase bed temperature slightly.
The beauty of the Ender 3 platform is that solutions to almost any issue are a quick web search away, thanks to the vibrant community.
Community Modifications and Upgrades (Ender 3 Community Mods)
One of the most exciting aspects of owning an Ender 3 is the virtually limitless upgrade ecosystem. The Ender 3 community mods culture has spawned thousands of creative improvements, from simple quality-of-life tweaks to transformative performance upgrades.
Popular Printed Upgrades (Free on Thingiverse/Printables):
- Cable Management Chains – Keep wiring tidy and prevent snags.
- Tool Holders and Drawers – Attach storage to the frame for spatulas, Allen keys, and nozzles.
- Filament Guides – Ensure smooth filament feeding from external spools.
- Fan Ducts – Improved part cooling for better overhangs and bridging.
- Display Knob Replacements – Larger, more ergonomic control knobs.
- Raspberry Pi Mounts – For running OctoPrint or Klipper firmware remotely.
Hardware Upgrades Worth Considering:
- All-Metal Hotend: The stock hotend works well, but upgrading to an all-metal version (like E3D or Micro Swiss) enables printing of higher-temp materials like nylon or polycarbonate.
- PEI Spring Steel Sheet: Easier print removal and better adhesion compared to the stock textured surface.
- Linear Rails: Replacing V-wheels with linear rails on the X or Y axis reduces friction and improves motion precision. This is a more advanced mod requiring mechanical skill.
- Silent Stepper Drivers: If noise is a concern, upgrading to TMC2209 or TMC2226 drivers makes the printer whisper-quiet.
- Dual Z-Axis Kit: Adds a second lead screw and motor for the Z-axis, improving stability and reducing “Z-banding” on tall prints. (The V3 Plus already has this.)
- Enclosure: A DIY enclosure made from acrylic panels or a lack table helps maintain temperature stability for ABS and reduces noise.
Firmware Modifications:
Advanced users often flash custom firmware like Klipper or Marlin. Klipper, in particular, unlocks features like pressure advance (reducing ooze), input shaping (on the SE, if you add an accelerometer), and remote monitoring via a web interface. Installation requires a Raspberry Pi or similar single-board computer and some Linux comfort, but the performance gains are substantial.
Why Modding Matters:
The ability to continuously improve your printer means the Ender 3 V3 SE or Plus isn’t a static product—it’s a platform that evolves with your skills and needs. A beginner might start with stock settings and gradually add mods as they understand what each improvement offers. This extensibility is why the Ender 3 series has remained relevant for years despite newer competitors.
The community aspect also means you’re never alone. Subreddits like r/ender3, Facebook groups, and Discord servers are filled with enthusiasts eager to help troubleshoot, share profiles, and celebrate successes. This collaborative spirit turns a hobby into a genuine community experience.
Conclusion: Is the Creality Ender 3 V3 SE Worth Buying?
After exploring specifications, features, comparisons, and practical usage, the question remains: should you buy the Creality Ender 3 V3 SE?
For most people stepping into 3D printing in 2025, the answer is a resounding yes. The V3 SE delivers a rare combination of affordability, modern features, and user-friendliness. The automatic bed leveling removes a major beginner pain point, while the Sprite direct extruder opens the door to flexible filaments and detailed prints that Bowden systems struggle with. At around $250-300, it’s a low-risk entry into a rewarding hobby.
Experienced users will appreciate the printer’s reliability and upgrade potential. You can start printing out of the box and gradually enhance performance through community mods and firmware tweaks. The massive Ender 3 ecosystem means replacement parts are cheap and plentiful, reducing long-term ownership costs.
However, it’s not perfect. The 220 × 220 × 250 mm build volume is limiting if you regularly print large objects. The lack of input shaping means you’ll see some ringing at the highest speeds. And while the Cartesian motion system is simple and robust, it can’t match the blistering pace of the CoreXZ Plus model.
If your needs include:
- Budget under $300
- General hobby printing (miniatures, household items, prototypes)
- A beginner-friendly experience
- Access to a huge support community
…then the Ender 3 V3 SE is an excellent choice.
Consider the V3 Plus if you:
- Need a large build volume for costumes, furniture, or commercial work
- Value print speed above all (600 mm/s with input shaping)
- Don’t mind spending $400-500
- Have some experience and are comfortable with more complex systems
Both printers carry forward the legacy that made Ender 3 a household name in 3D printing. They’re not flashy or exotic, but they’re dependable workhorses that help you turn digital dreams into physical reality. And in a space crowded with overhyped gadgets, that reliability is golden.
Whether you’re printing your first Benchy or your thousandth miniature, the Creality Ender 3 V3 SE offers a friendly, capable platform to bring your ideas to life. It’s a budget 3D printer for 2025 that doesn’t feel like a compromise—it feels like a smart investment in creativity.
FAQ: Common Questions About the creality ender 3 v3 se review
Q: Can the Ender 3 V3 SE print TPU and other flexible filaments?
A: Absolutely. The Sprite direct drive extruder is specifically designed to handle flexible materials like TPU. Just reduce print speed to 20-30 mm/s for best results and ensure your slicer’s retraction settings are optimized for flex.
Q: How difficult is assembly for a complete beginner?
A: Not difficult at all. The SE comes mostly pre-assembled. You’ll attach the vertical gantry to the base, plug in a few connectors, and run the initial bed leveling. Most users finish assembly in 30-60 minutes following the included manual or online video guides.
Q: Does the V3 SE support Wi-Fi printing?
A: Yes, via Creality Cloud. You can upload G-code files from your phone or computer and start prints remotely. However, many users prefer SD card printing for stability, especially on longer jobs.
Q: What’s the loudest part of operation?
A: The cooling fans. The stepper motors are relatively quiet, but the part cooling fan and hotend fan can be noisy. Upgrading to Noctua fans is a popular mod to reduce noise significantly.
Q: Can I upgrade the V3 SE to match the Plus’s speed?
A: Not fully. The Cartesian motion system and frame aren’t designed for 600 mm/s speeds. You can improve performance with firmware tuning and better cooling, but you’d need extensive hardware changes (linear rails, different motors, input shaping hardware) to approach the Plus’s capabilities. At that point, buying the Plus outright makes more sense.
Q: How much does a typical filament spool cost, and how long does it last?
A: A 1 kg spool of PLA costs $15-25 depending on brand and quality. How long it lasts depends entirely on what you print. Small decorative items might use 20-50 grams each, so a spool could produce 20-50 prints. Large models can consume 500+ grams in a single job.
Q: What warranty comes with the Ender 3 V3 SE?
A: Creality typically offers a 1-year warranty covering manufacturing defects. Extended warranties or protection plans may be available through certain retailers. Always verify warranty terms at point of purchase.
Q: Is PLA filament biodegradable?
A: PLA is made from renewable resources (corn starch, sugarcane) and is technically biodegradable under industrial composting conditions (high heat, specific microbes). However, it won’t degrade in your backyard or landfill in any reasonable timeframe. Recycle failed prints if facilities exist in your area, or repurpose them into filament via a recycling extruder.
Q: Can I print functional parts, like gears or brackets?
A: Yes! Many users print functional mechanical parts. PETG is great for parts needing flexibility and chemical resistance, while PLA+ offers improved toughness over standard PLA. For high-stress applications, consider nylon or polycarbonate (requires all-metal hotend and enclosure).
Q: How do I know if my nozzle is clogged?
A: Signs include under-extrusion (gaps in layers), inconsistent filament flow, or the printer skipping steps during extrusion. Perform a cold pull or disassemble the hotend to clear stubborn clogs. Regular cleaning prevents most issues.
Q: What’s the best place to find models to print?
A: Thingiverse, Printables (by Prusa), MyMiniFactory, and Cults3D host millions of free and paid models. Always respect licenses—many models are for personal use only and can’t be sold without permission.
Q: Can I leave prints running overnight?
A: Many users do, but take precautions. Ensure smoke detectors are functional, never leave home while printing, and consider a smart plug or camera to monitor progress. Modern printers have thermal runaway protection, but it’s wise to stay safe.
Q: How often should I replace the nozzle?
A: Brass nozzles wear over time, especially with abrasive filaments (wood-fill, carbon fiber). For standard PLA/PETG, a nozzle can last 6-12 months. If you see inconsistent extrusion or damaged threads, replace it. Hardened steel nozzles last much longer with abrasives but conduct heat less efficiently.
This comprehensive guide should equip you with everything needed to make an informed decision about the Creality Ender 3 V3 SE. Whether you join the millions in the Ender 3 community or explore other options, the world of 3D printing awaits—full of creativity, problem-solving, and the satisfaction of making tangible objects from digital files. Happy printing!
Explore the full breakdown of performance, design, and technology in the Denza flagship shooting brake. From luxury interior details to next-gen EV engineering, everything is covered in depth. Read the complete review here: https://autochina.blog/denza-z9-gt-shooting-brake-review/ and see why this model is redefining premium electric mobility in 2025.